Step-by-Step Guide: Hosting Your First Website with Cloudflare and Docker

We’ll dive into a hands-on tutorial to host your first website using Cloudflare and Docker. For more information about Docker refer From Zero to Docker: A Beginner’s Journey and for how hosting works refer Unlocking the Power of Hosting: How Cloudflare Streamlines Your Online Experience, this guide will walk you through deploying a webpage using a Nginx web server inside a Docker container. We’ll also leverage Cloudflare for DNS management, ensuring secure and efficient traffic routing to your site. Whether you're new to Docker or just looking to refine your hosting skills, this step-by-step guide is designed to make the process smooth and accessible. Let’s get your website live!
Getting Your Domain Name:
There are many domain providers available in the market, but in this guide, we'll focus on Namecheap, where you can find domains starting at just $1.
- Visit Namecheap.com and create a new account.
- After logging in, navigate to the Domains tab and search for a domain that suits your needs.
- Once you've found the right domain, add it to your cart and proceed to checkout.
- Enter your payment details and complete the purchase.

Note:
Namecheap only accepts Visa or MasterCard with international transactions enabled.
Getting Started With Cloudflare:
Cloudflare Argo Tunnel provides a secure way to expose your website to the public without directly exposing your internal system, ensuring that only traffic routed through Cloudflare can access it. In addition to this secure tunneling, Cloudflare offers a robust suite of services, including a Content Delivery Network (CDN) to improve loading times, DNS management, DDoS protection, and SSL encryption to enhance both performance and security against online threats.
- Visit Cloudflare.com: Start by creating a new account on Cloudflare if you haven’t already.
- Add Your Domain: After logging in, click on the Add a Site button, enter the domain name you purchased from Namecheap, and click Add Site.
- Choose Your Plan: Select the Free Plan option and click Continue.
- Update DNS Records: On the DNS Records screen, delete any existing records, then click Continue.
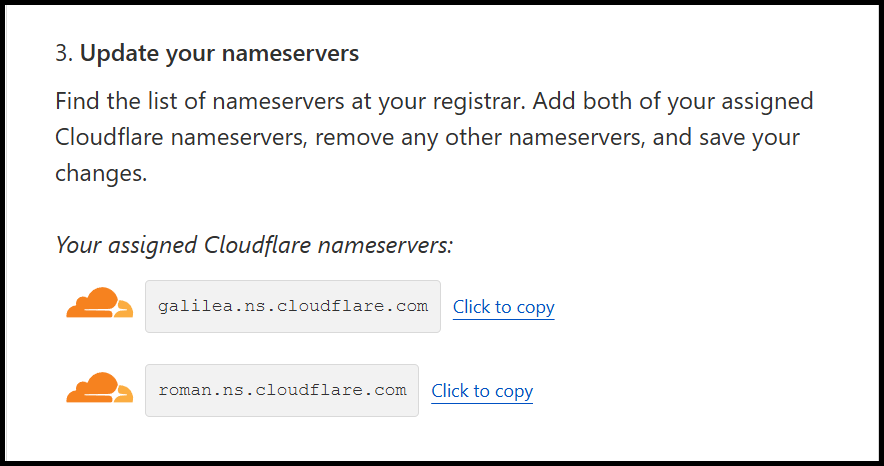
- Copy Cloudflare Nameservers: You’ll see two nameserver fields under the nameservers section. Copy these values.

- Set Nameservers on Namecheap:
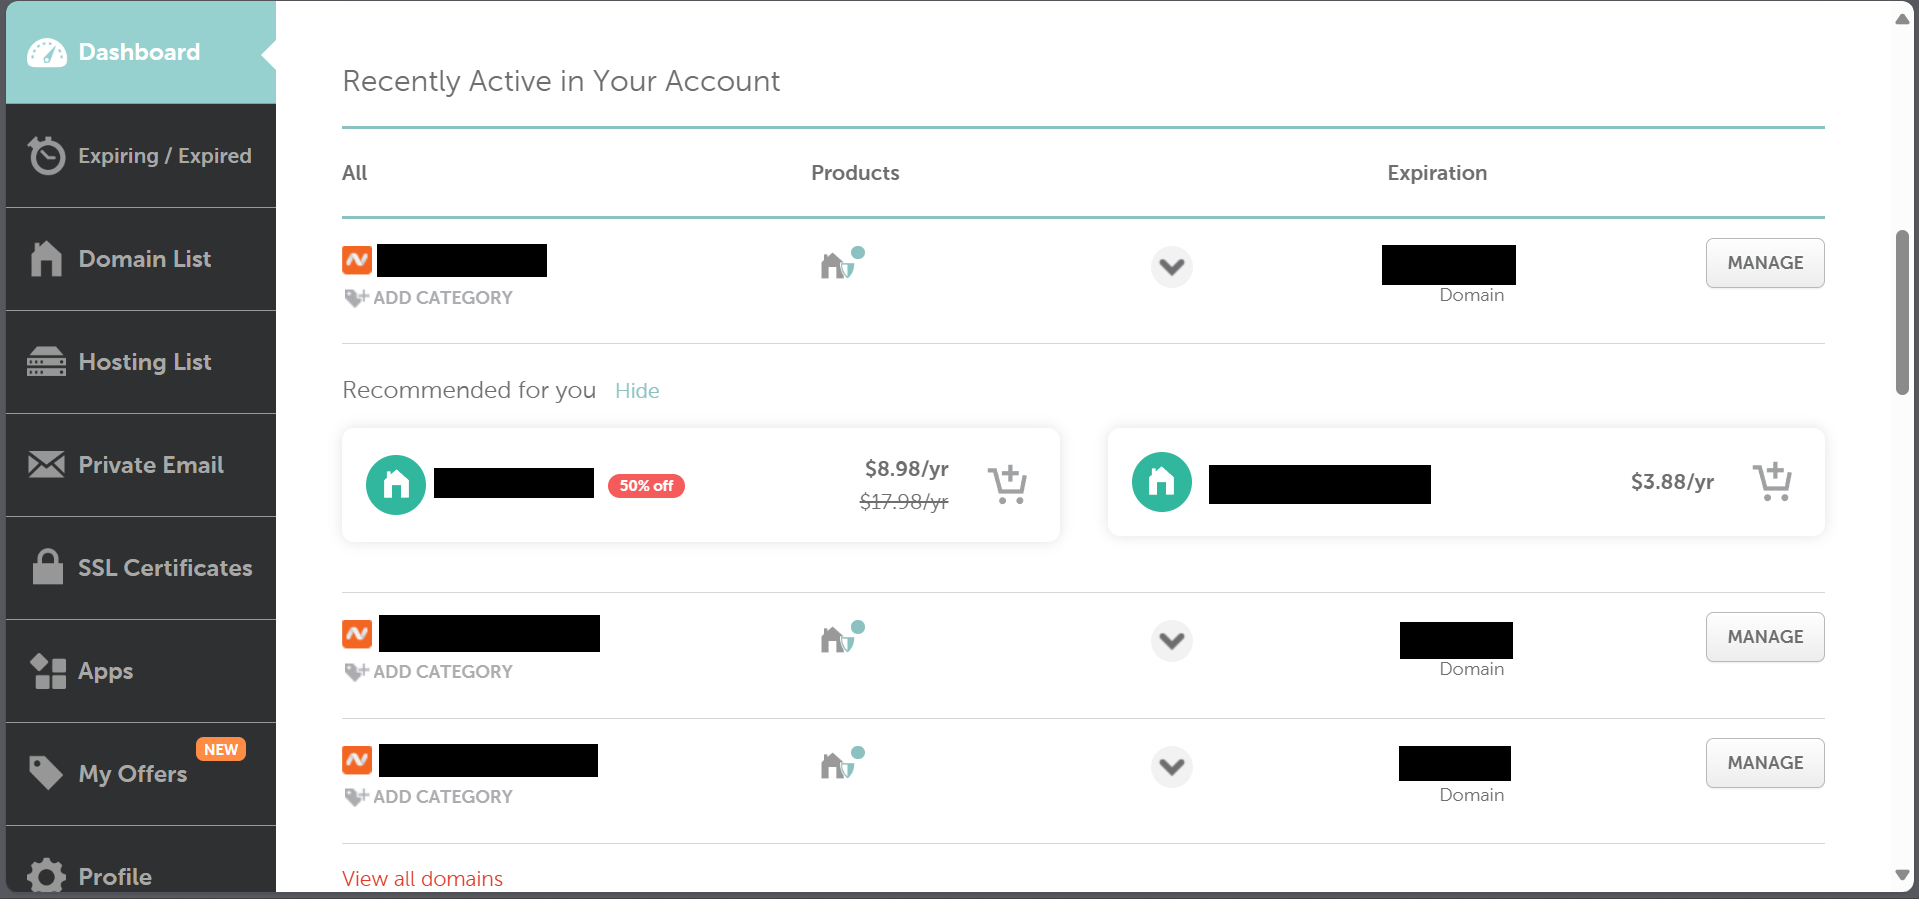
- Go to your Namecheap Dashboard and click Manage on your domain.
- Under the Nameserver section, select Custom DNS and paste the nameservers copied from Cloudflare.

- Domain Activation: Within 24 hours, your domain will be activated on Cloudflare, securely routing traffic through their network.
With these steps completed, your domain is now connected to Cloudflare, offering optimized performance and enhanced security for your website.
Setting Up the Cloudflare Tunnel:
In this section, we'll guide you through setting up the Cloudflare Tunnel Client. This setup ensures that your website remains protected while being accessible to users, leveraging Cloudflare’s security and performance benefits.
1. Install Cloudflare Tunnel Client (Cloudflared)
- First, install Cloudflared, which allows you to create a secure tunnel to your System.
For Windows:
Download Cloudflared EXE file from cloudflare.com
For Linux:
- Download Cloudflared .deb file from cloudflare.com
- Install it by executing
sudo dpkg -i ./cloudflare_file.deb
2. Authenticate Cloudflared with Cloudflare Account
- Run the following command to authenticate Cloudflared with your Cloudflare account:
cloudflared login
- This will open a browser window where you can log in to your Cloudflare account and select the domain you want to use.
3. Create a Tunnel
- After authentication, create a new tunnel by running:
cloudflared tunnel create <TUNNEL_NAME>
- Replace
<TUNNEL_NAME>with a name for your tunnel (e.g., "my-website-tunnel"). This command will create a unique tunnel ID and a credentials file required for your tunnel configuration.
4.Add DNS To Your Tunnel
- You can add your DNS to your tunnel by using the following command.
cloudflared tunnel route dns <TUNNEL_ANME> <YOUR_DOMAIN>
5. Configure Tunnel Settings
- Next, set up a configuration file to specify how the tunnel should operate.
For Windows:
You can find the .cloudflared folder inside C:/Users/USER/
For Linux:
You can find the .cloudflared folder inside /home/USER/
- Create the configuration using the following syntax inside the .cloudflared folder:
tunnel: <YOUR_TUNNEL_ID>
credentials-file: ~/.cloudflared/<YOUR_TUNNEL_ID>.json
ingress:
  - hostname: <YOUR_DOMAIN>
    service: http://IP_FOR_YOUR_SERVICE:YOUR_service_PORT
  - service: http_status:404
- Replace
<YOUR_TUNNEL_ID>with your tunnel ID,<YOUR_DOMAIN>with your website domain, andYOUR_SERVICE_PORTwith the port on which your application is running.
Run A Sample Service With Nginx
- Pull the NGINX Image
Run the following command to pull the official NGINX image:
docker pull nginx
- Run the NGINX Container
Use this command to start the NGINX container and expose it to port 80
docker run -d -p 80:80 --name my-nginx nginx
- Access the Website
Visithttp://localhostin your browser to see the NGINX welcome page.
Build And Run Cloudflared as a Docker Container:
Setting up Cloudflare tunnels with Docker makes your system more modular, simplifying deployment and management. This guide will walk you through creating a Docker container that uses Cloudflare’s cloudflared client, allowing for secure and efficient tunneling.
1.Create the Dockerfile:
- Start by creating a
Dockerfileto define the container. This file will configure a Debian-based container, installcloudflared, and set it to automatically run the tunnel upon starting.
FROM debian:stable AS build

RUN apt update && apt upgrade
WORKDIR /etc/cloudflared/

COPY PATH_TO_.CLOUDFLARED ./
COPY CLOUDFLARED.deb_FILE_PATH ./cloudflared.deb
RUN dpkg -i ./cloudflared.deb

CMD [ "cloudflared", "tunnel", "run", "YOUR_TUNNEL_NAME" ]
- Base Image: We use the latest stable Debian image to keep things lightweight.
- Copying Files: We copy necessary files to install
cloudflaredand access our configuration. - Install Cloudflared: The
.debfile installation provides the cloudflared binary. - Command: Sets the container to run
cloudflared tunnelwith the specified tunnel name.
2.Build the Docker Image
- With the Dockerfile ready, build the Docker image
docker build -t cloudflared-tunnel .
- This command builds an image called
cloudflared-tunnel. It reads the Dockerfile instructions and packages everything needed to runcloudflaredin a container.
3.Run the Docker Container
- Finally, use the following command to start the container
docker run -d --name cloudflared-container cloudflared-tunnel
- The
-dflag runs the container in the background, allowing your tunnel to operate without taking up your terminal.
4.Verify Domain Accessibility for Your Domain
- Visit
http://YOUR_DOMAINin your browser to see the YOUR_SERVICE (Here Nginx) welcome page.
Conclusion:
Hosting your website with Cloudflare and Docker may seem complex, but with each step mastered, you're adding both security and resilience to your online presence. With Cloudflare and Docker, you may craft a site that's not only live but secure, scalable, and future-ready. This setup is your launchpad—now, it’s time to take your online presence to new heights!


